Christmas in July

I know lots of you are starting to make your Christmas cards already (you're far more organised than me!) so to help you along your way, here is a free Christmas bauble digi stamp - click here or on the picture below to download


I'd love to see what you make with it, you can share your makes on my Facebook page!

Sarah x

Cardmaking with Crate Paper

Todays card is made with Crate Paper goodies, Emma's Shoppe paper and chipboard stickers...

The lovely seam binding ribbon is from Crafty Ribbons and the Bakers Twine is from The Twinery.

I actually made this to try out my new Woodgrain Cuttlebug Embossing folder - I'm obsessed with it already, this is like when I got my corner rounder punch (notice most of my cards have rounded corners!) well, now you will be seeing a lot of embossed backgrounds! LOL

Tomorrow I'm off for a meeting with the Kuretake girls in London, I've been pulling samples together to take with me for the shows on Thursday so look out for them and see if you can spot any of mine, I'll post them on my blog after the shows too so you can have a proper look.

Sarah x

Rocket Age Card!

Last week I got a lovely box of scrappy goodies including the beautiful 'Rocket Age' line from October Afternoon. I was a little bit stuck as to what exactly to do with it as it's very geared towards little boys and I don't know any little boys to scrapbook! so I made some cards instead (it's too gorgeous not to start using!)

Here is the first one...


I can't wait to make more projects with it - too pretty!

This weekend I took most of the weekend off and played my xbox until my eyes dried up and fell out (well, nearly!) it was such fun, my sister thinks I'm secretly a teenage boy - video games are my guilty pleasure!

Sarah x

Punky Scraps Challenge!

This week is my last challenge as the Guest for the Punky Scraps Challenge blog - it's been lots of fun!

This week we were given a list of random things which our layout had to incorporate, I was a bit out of my comfort zone but ended up loving the layout I created...


Pop over and take a look - there are some super inspirational projects this week!

Sarah x

Watercolouring for Creativity International

Recently I was sent some Strathmore Paper sketchbooks by Creativity International to try out, one for drawing and one for watercolouring. As you probably know, watercolouring is not one of my strongest areas so always being up for a challenge, thats the one I started with!!
The first thing I was struck by was the quality of the paper, I have tried out a number of different papers before, usually I get frustrated at the buckling and decide to give up watercolours forever (or until I come across my Inktense pencils and fall in love all over again!) the only thing I have achieved a result I was proud of on is board. The paper in this pad was very thick (for crafters, think of the thickness of Bazzill cardstock) and had a lovely texture to it. It took me a long time to stop gazing at the snowy white perfection and start experimenting! To make things even more difficult for myself I decided not to start with my Inktense pencils but instead to dig out the tiny set of watercolour paints I have had for a million years and used a grand total of twice on my interior design coursework!
I wanted to just get used to the paper, try a few things and see if I could master it (and get as much paint on as possible to see if I could break it, ha!) You can see here the lovely texture of the paper
  I managed to get around 3 layers of paint on before the paper started to buckle ever so slightly (pretty good!) as you can see here...
 I managed 4 layers of Inktense colouring (for which you use less water) and still no buckling, it was also thick enough to be cut and layered onto a card using foam pads and look as good as a chipboard embellishment or cardstock sticker would - I will definitely be using it for my Inktense colouring with my crafts again.

Here is my image coloured with Inktense pencils which I made into a card (using the Papermania Kraft basics pad, Cuttlebug Swiss dots embossing folder and a scrap of paper from the TPC Christmas Village kit)


I will be trying out the drawing pad later this week and will post my thoughts on that one too (for now I'm still at the 'gazing at the snowy whiteness of the paper' stage before I start messing with it!)


Sarah x

Digi Scrapping LO

Today I'm sharing a digi-scrap layout, I haven't digi scrapped for ages!! so last night I dug out my HD drive with all my kits on and made a couple of layouts using GallimaufryUK kits - this one is my favourite!

The picture is one my mum took of my little sisters sitting in an old car at a museum they visited, I think it's such a cute pic and I've scrapbooked it about 3 times now!

I've used the 'Granny's House' and 'Bloomin Lovely' kits which you can get hold of here.

I'm still getting used to digi scrapping but the more I do it, the more I like it! I'm trying to make enough layouts to get them printed into a picture book so I have an actual album as I would with my paper scrapping.

I've also switched to scrapping in illustrator rather than photoshop, I find the layers easier to see and control and the elements easier to move and resize, I suppose it's what you get used to!

If you have any digi scrapping tips, I'd love to hear them :o)

Sarah x

A Challenge!

This week on the Challenge blog we have a fantastic 'Colouring' challenge with a great sponsor - Robyns Fetish Digi Stamps!

Here is my card, coloured with my Promarkers, I love these cute bunnies!

Pop over to the Challenge blog to see fantastic projects from my design team and enter your own creation for the chance to win a prize!

Sarah x

Letraset Promarker Ultra Fine Nibs

A few weeks ago Letraset sent me some of these lovelies to test and blog about - the new Ultra Fine Nibs!

 
I've been using them but haven't got round to the bloggy bit yet, so here we go! These clip over the end of your Promarkers (at the smaller bullet tip end) and create and much more detailed nib for your colouring or drawing. You can see from the strokes here (Chisel nib, bullet nib and the new Ultra Fine Nib)


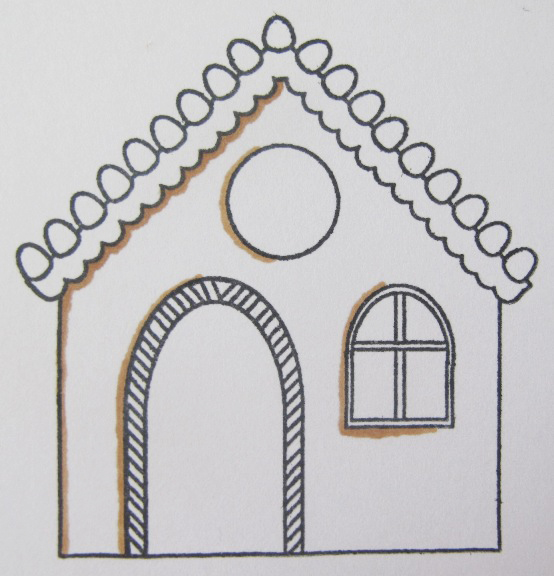
I found my own design stamp of the Gingerbread House (from the Christmas Cheer set) as I knew it had lots of fine detail, I remember making samples for the shows and struggling a little bit with the colouring of this one, I was using a 'dotting' technique to get the colour as precise as possible and correcting any mistakes with a white or colour gel pen, I knew if the new ultra fine nibs could tackle this challenge I'd be sold! This is one of my favourite ever stamps and I make lots of my Christmas cards with it so it's important to me to be able to get the colouring right!

First I stamped the image onto Rymans coated card using a Memento ink pad so I knew there would be no bleeding or smudging, the I started to colour the main part of the house, starting with my darkest shade first into the shadow areas. The one on the left is with the normal fine end of the pen and the one on the right is with the ultra fine nib attached...

If you click on the pictures you can see closely, there is some slight bleeding on the normal nib (I would normally have covered this over with a white gel pen and added stickles to hide it) and the one on the right has no bleeding at all - I've managed to get right into those detailed areas as well!

The places on this image that I've struggled with previously are the detail round the door and the window frame, again some comparisons with the normal nib on the left and the ultra fine nib on the right... (you can click on the images to make them bigger)


Here is the final image, again coloured with just the normal Promarker on the left and with the Ultra fine nibs on the right


As you can see, once complete there probably isn't an awful lot of difference unless you look very closely, but being a bit of a perfectionist every smudge to me looks 200% bigger than it actually is, so these new nibs are fantastic, it just gives your colouring in that extra bit of polish and more professional results - try them now, you get free nibs with every purchase of Promarkers either directly from Letraset or through selected retailers - check your local art or craft shop for details!

And finally, here is the card I made from the final coloured image... (the perfect one of course!)


The papers are the lovely TPC studios 'Christmas Village' range, contact Bramwells for stockists.

I'll be posting some more Promarker tips and tricks soon, I just need some better light to photograph all my projects!

Sarah x

A Day in London

Today was another busy and exhausting day in London, I was up finishing my prep work until late last night before a very early start this morning.

Now I have a magazine project to finish up so the adhesive dries ready for me to post tomorrow - I'll let you know when to look out for it! :o) 

I received lots of emails today and I promise to answer them all tomorrow, but for now, I must sleep!!

Sarah x

Punky Scraps - July Guest Designer


The lovely Nat at the Punky Scraps Challenge Blog asked me if I would be guest designer for her for July, and how could I refuse! The challenge blog is so fun and gave me an excuse to break out of my comfort zone a little bit and try some new (and messy!) things - the Design Team don't hold back and their layouts are some of the most bright, colourful and experimental I've seen - always inspiring!

So for my first challenge, I had to use Tissue Paper on a layout, at first I thought I would take the relatively easy way out and make some tissue paper flowers or rosettes, but then I thought I should use this opportunity to really experiment properly with a material I wouldn't normally use. Soooooo....

Here is my Tissue Paper Layout....

 I used medium and scrumpled tissue paper to make my own background paper, creating lots of texture as I went and trying not to be afraid to wrinkle and crumple as I went! Once it was dry I used a blue Distress Ink (I can't remember if it was Blue Jeans or Tumbled Glass) and run the ink pad over the top gently to add some colour and highlight all the texture.

When that was dry I then got a big blob of stickles on my fingers and rubbed it all over the paper - I loved the icy snowy look it created and it matched this picture of the snowy view from my desk last winter. Kraft card was the perfect accent (it is to everything really!)

So there you have it, it's not my usual style, it was very messy, but I had tons of fun making it!!

To see the other layouts and join in the challenge click here to visit the Punky Scraps blog.

Sarah x

Quick Update...

Just a quick post from me today, I've been working flat out on soooo many new designs today and my eyes are now swirling like that snake in the Disney Jungle Book Film so I can't promise that anything I write would be coherent or entertaining, sorry! Therefore I will save you having to read my tired rantings by simply not writing them, I will give my art journal a bashing instead, maybe that can make sense of me! :o)

First I have to unbury myself from the various notebooks, sketchbooks and pieces of paper that seem to have accumulated round me throughout the course of the day!

I will do my absolute very best to blog something interesting tomorrow, maybe even with a picture or two!

Sarah x

An Altered Book

About a year ago I bought a papier mache book from Hobbycraft, I've been waiting for the perfect project for it and finally it came together with a chipboard house and some die cuts from my Cricut Expression...


First I covered the outside of the book with torn book pages using medium to stick it all down - I made sure to open the book half way through drying to ensure it could still open and that there was no cracking or bubbling of the paper. While that was drying I made the chipboard house and used a strong glue (Bostik) to glue it to the front of the book and painted it with a coat of white gesso.

When the medium was dry I run some fine sandpaper over so that the surface wasn't so shiny, then I sprayed it with my ink sprays in Midnight, Teal, Imperial Purple and Lipstick - I sprayed randomly and then used kitchen towel to blot and spread out the colour. When that was dry I painted the house in white and brown with acrylic paint and used gold acrylic paint for the side where the pages should be (the book reminded me of the old Readers Digest ones that my grandad used to collect - they all had gold edged pages - very fancy!)


I then cut shapes from the 'Heritage' expression cartridge for the fence (can you imagine trying to cut that by hand? eeek!), birds and trees and handcut the grass from a scrap of green bazzill. I cut the trees and braches from cream card and painted them to keep the hand painted look of the project consistent. It only took a few minutes to paint the leaves and trees. Once all the paint was dry I used glossy accents to attach all the die cut shapes.

 Finally I run some gold paint over the birds and butterflies just using a fairly wet brush so the colour wasn't too strong and it was more of a glaze.

I think the back still needs a little something but I've not decided what just yet - maybe some journaling when I've made the mini book to go inside (like a book synopsis) but I'll keep you posted once I've decided!

Today I've been locked in my studio again all day working on crafty projects until I had no drying surfaces left! This evening I have some designs to work on and emails to catch up on!

Sarah x

A Creative Day

Now my studio is all tidy and I have space (although the Fedex man arrived at 7am with boxes to fill some of that!) I decided to get cracking on the long list of projects I have to do so today I was covered in paint, ink, marker, glue, medium, you name it! Most of which are in various stages of drying and are not ready to show yet but which I will be showing you over the next few days.

Here are a couple of quick cards I made with some scraps while I was waiting for various things to dry etc...

 
Today was obviously a flowery day! Most of the bits used are October Afternoon and Crate Paper.

At the weekend I sorted my papers by manufacturer (replacing my old system of paper just being put in the top box and then moved around while I was looking for things - just a piece of advice for you, that system does NOT work!) while I was sorting I found that most of my paper is October Afternoon, I wasn't too surprised, I tend to buy 2 of everything! LOL

While I was working I carried on watching Desperate Housewives - I'm on the last DVD of series 6 now so I'll be finished soon, I don't know what I'll do after that! Fingers crossed series 7 is out soon, I might try 'Mad Men' in the meantime, I've only seen one episode but it was pretty good, any recommendations? (I've got a LOT of studio time over the next few weeks and need entertaining!)

Sarah x

Catching Up!

I've had about 10 emails today asking if I'm OK as I haven't blogged since Wednesday (eeeek!) and I've not been tweeting much - oooops! sorry I didn't mean to disappear like that I just got caught up with things and didn't realise it had been that long!

So, here is what you missed...

Thursday I caught up on lots of illustration work, I had an email from my agent regarding a book that is in discussion and I was working on some rough sketches for that, I'm keeping everything crossed for that project because I think it will be a corker!

Friday my sister and friend were in town to see Take That so I met them for breakfast, coffee and gossip in the West End before a quick visit to Hamleys, here is me with Lego Darth Vader - my dad will love this pic! (I however do not, the lighting is terrible in there and makes me look horrible! LOL)

After that I met my friend Emma at Piccadilly where we visited a tiny craft market in the grounds of a church before coffee and catching up with everything thats been happening (lots of clapping and excited squealing, LOL) then we wandered along to Bond Street passing by for a snoop at Vogue House to see if we could maybe catch a peek of the next issue (no such luck!) before a trip to Alessi where we coveted pretty egg cups and pen holders (which were sadly too small for our Promarkers) and then onto Butler and Wilson where we gazed at sparkly things in wonderment, I think we tried on every piece between the two of us!

As for the weekend I have been locked in my studio, sadly not creating for most of it but tidying and clearing and making space for the new things arriving - there is now space to be filled - yay! I did get the chance to make a start on a few projects this evening so I will be showing those next week :o)


I promise to be a better blogger next week!

Sarah x